Some time ago, one of our clients asked us to create a coupon code that would extend the trial period from 10 days to 30 days. We thought “sure that must be super straightforward, and it must be supported already”, but to our surprise, it wasn’t, and it wasn’t that simple either. After some research, we figured out a way to solve the problem. Of course, it is specific for this particular situation, but with some changes, it can be adapted to other scenarios.
Initial set up
To demo this solution, and since I don’t want to share information about our client’s site, I set up a local WordPress named wootest (I know, best name ever) here is my setup:
- WordPress 4.7.2
- WooCommerce 2.6.14
- WooCommerce Extended Trial Coupon 1.0
- WooCommerce Memberships 1.7.0
- WooCommerce Stripe Gateway 3.0.7
- WooCommerce Subscriptions 2.0.20
- Advanced Custom Fields 4.4.11
Keep in mind that for this demo I didn’t focus on design, I used the default styles that came with WordPress so don’t judge me 😉
Basic product and membership
First, I will show you how to set up the basic product and membership, and then I’ll explain the steps to set up a new custom coupon type to support an extended trial. So, let’s get the boring part out of the way. Start by installing all the plugins listed previously, once you do that, let’s create our product.
- First, go to Products -> Add Product, you will need to choose a name for this brand new product, for this example we will name it “Tower Subscription”, add any description you want, it is not important for this demo.
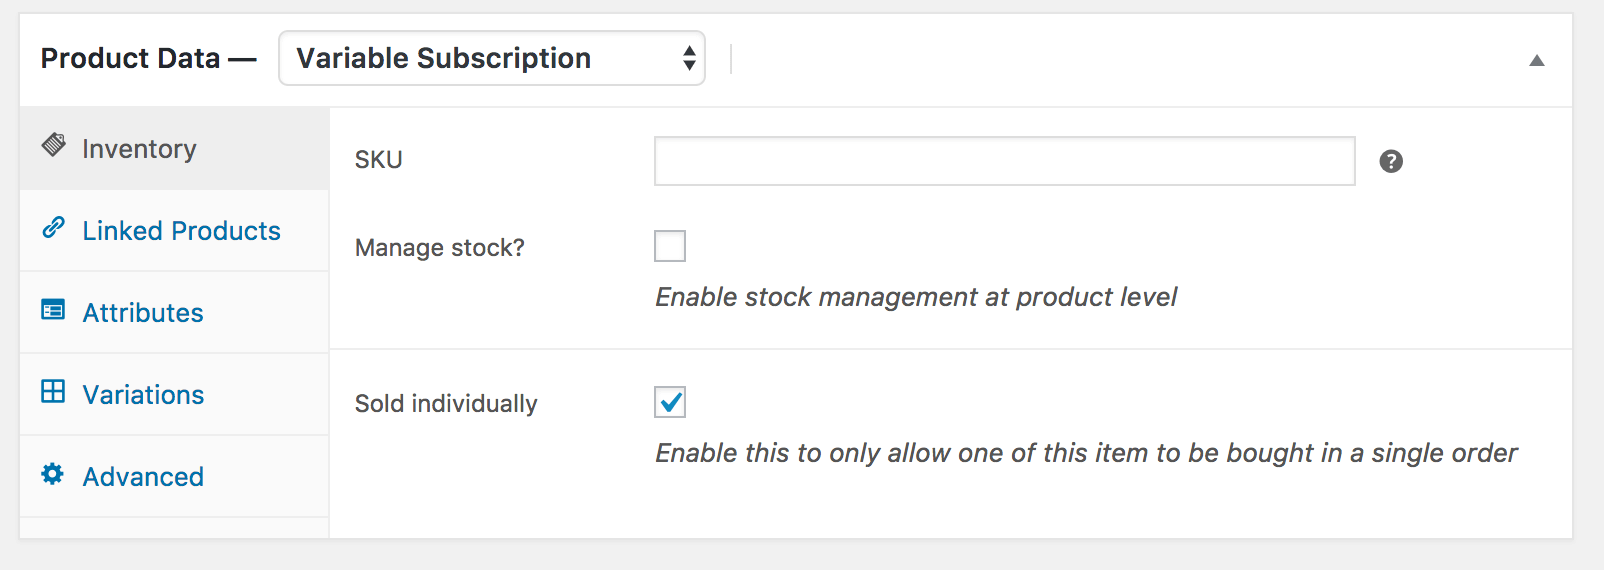
- Select “Variable Subscription” from the Product Data dropdown
- Click in the Inventory section and select “Sold individually”
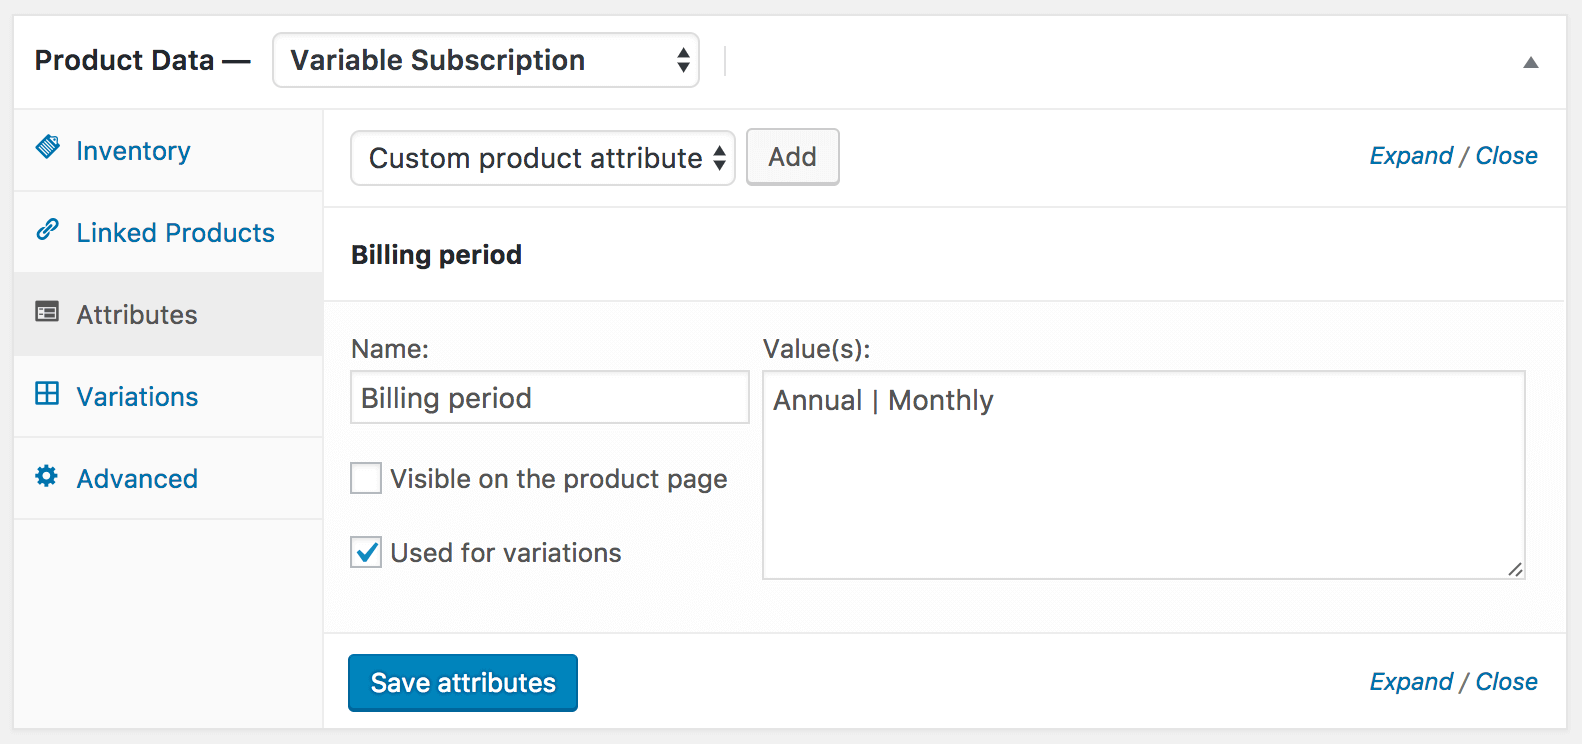
- Click in the Attributes section and click “Add”, next to “Custom product attribute”
- For the name select “Billing period”
- For the values type Annual | Monthly
- Be sure to check “Used for variations”
- And then click “Save attributes”
- Now it is time to add the variations, click in the “Variations” section
- With the “Add Variation” option selected click the “Go” button
- Initially, we will set up our 2 main variations, one Annual plan, and a Monthly plan, both with a 10-day trial period.
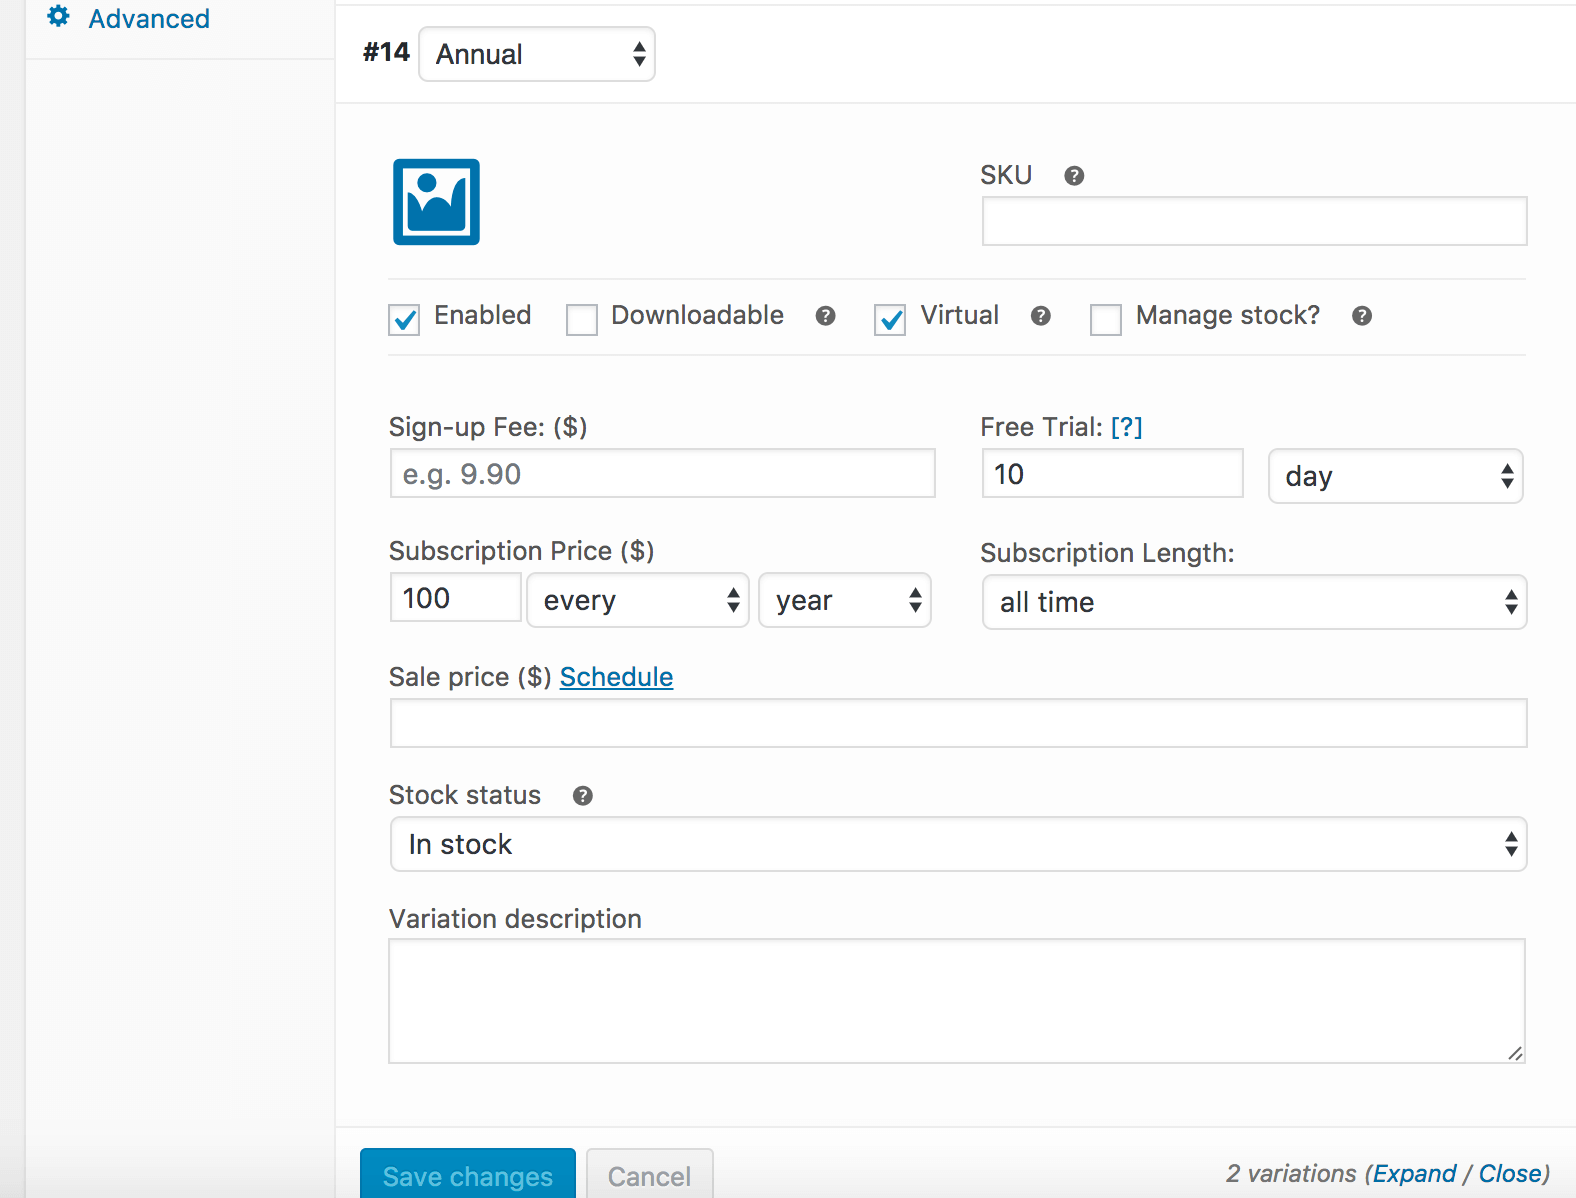
- For the first one select “Annual”, set “Enabled” and “Virtual” as true
- In the “Free Trial” field type 10 and select “day” from the dropdown
- For the subscription price set 100 every year and for subscription length, select all time.
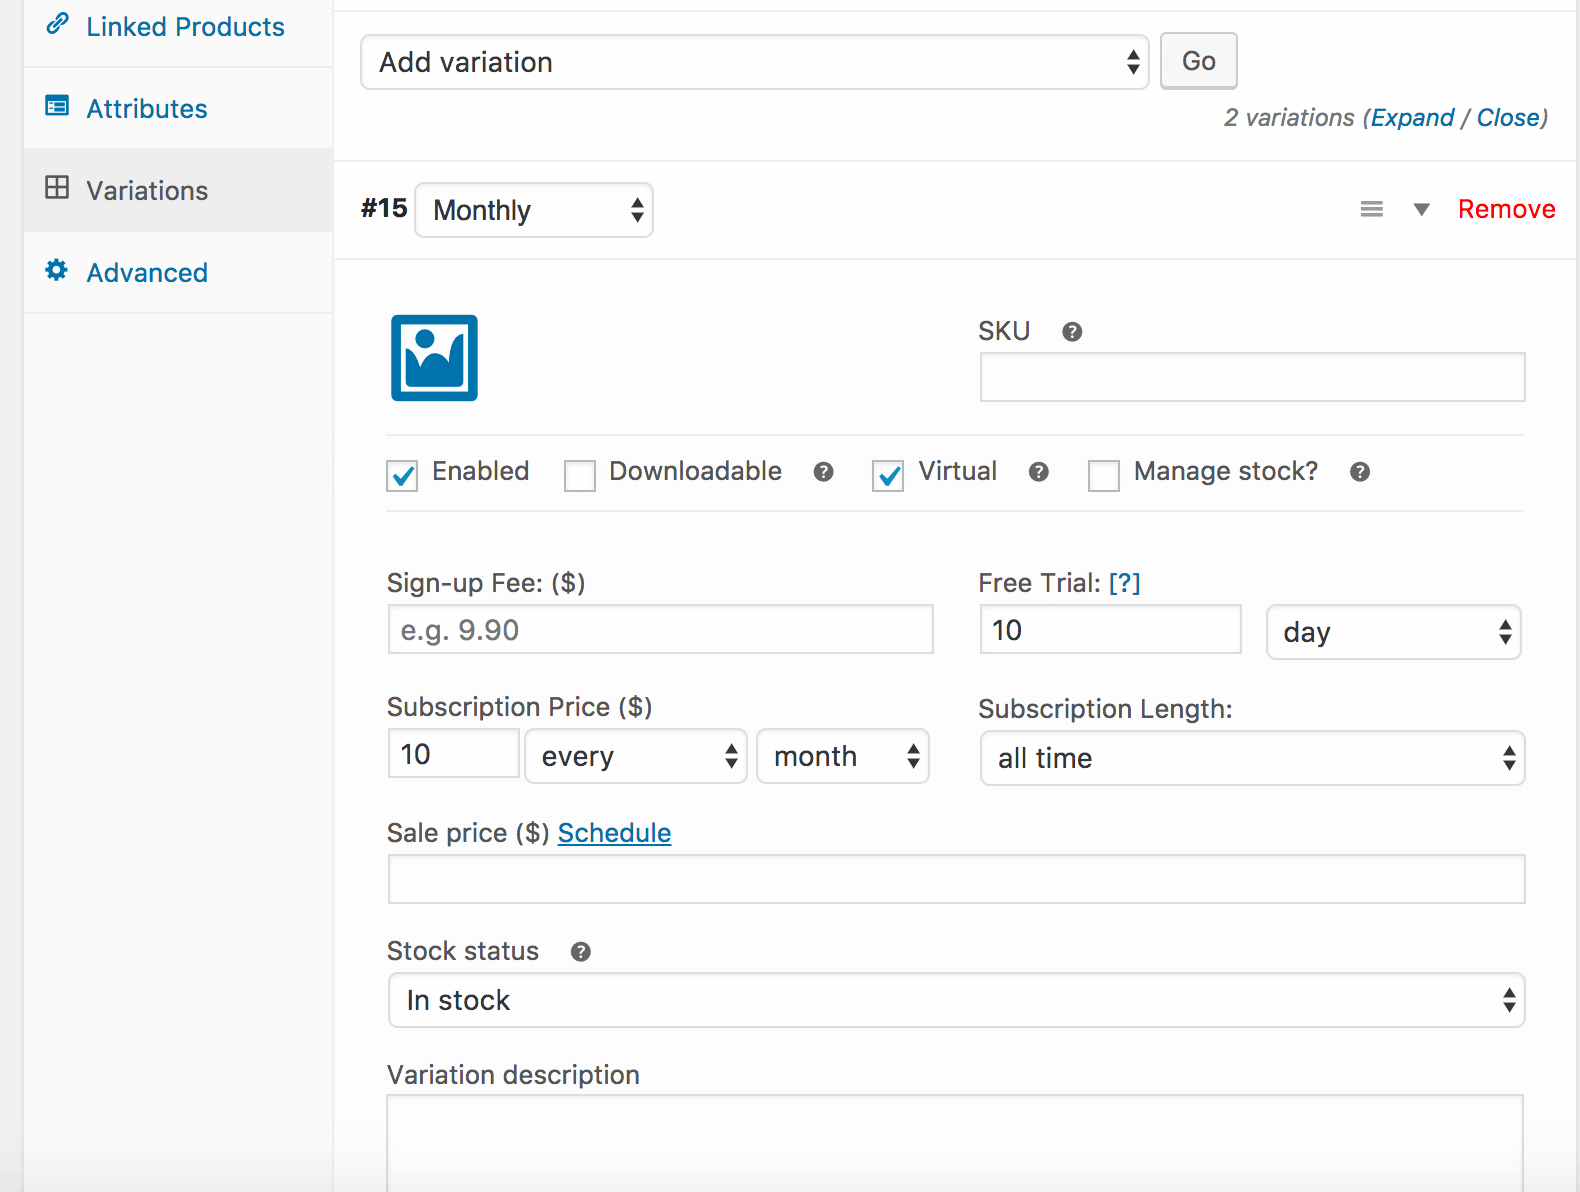
- Create a new variation, Monthly this time
- Do the same as before with the exception of the Subscription price: in this field type 10 every month
- Click “Save Changes” button and publish the product
With this, we have our base product set up, now it is time to create our membership plan
- Go to WooCommerce -> Memberships -> Membership Plans -> Add Membership Plan
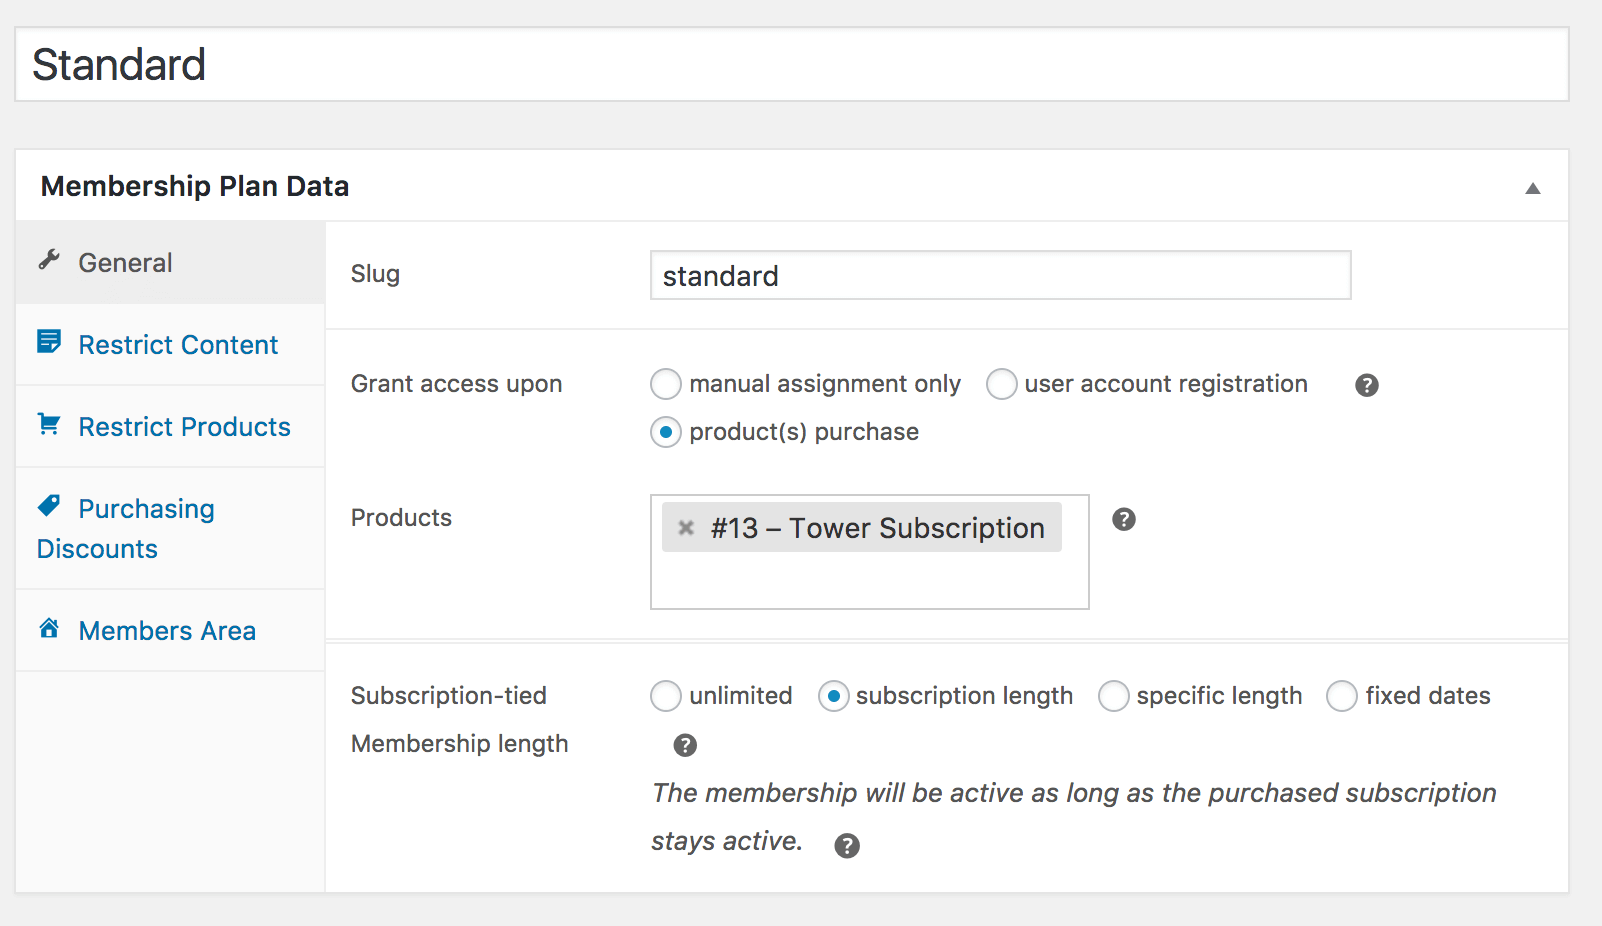
- For the name type “Standard”
- In the general section select “product(s) purchase” and start typing the name of the product we just created, in this case, “Tower Subscription”
- Publish the membership
At this point we have one product with 2 variations and one membership plan, if we click “Visit Store” from the main menu, we will see the new product listed, and if you click “Select options” you will be able to select the Annual or Monthly variation.
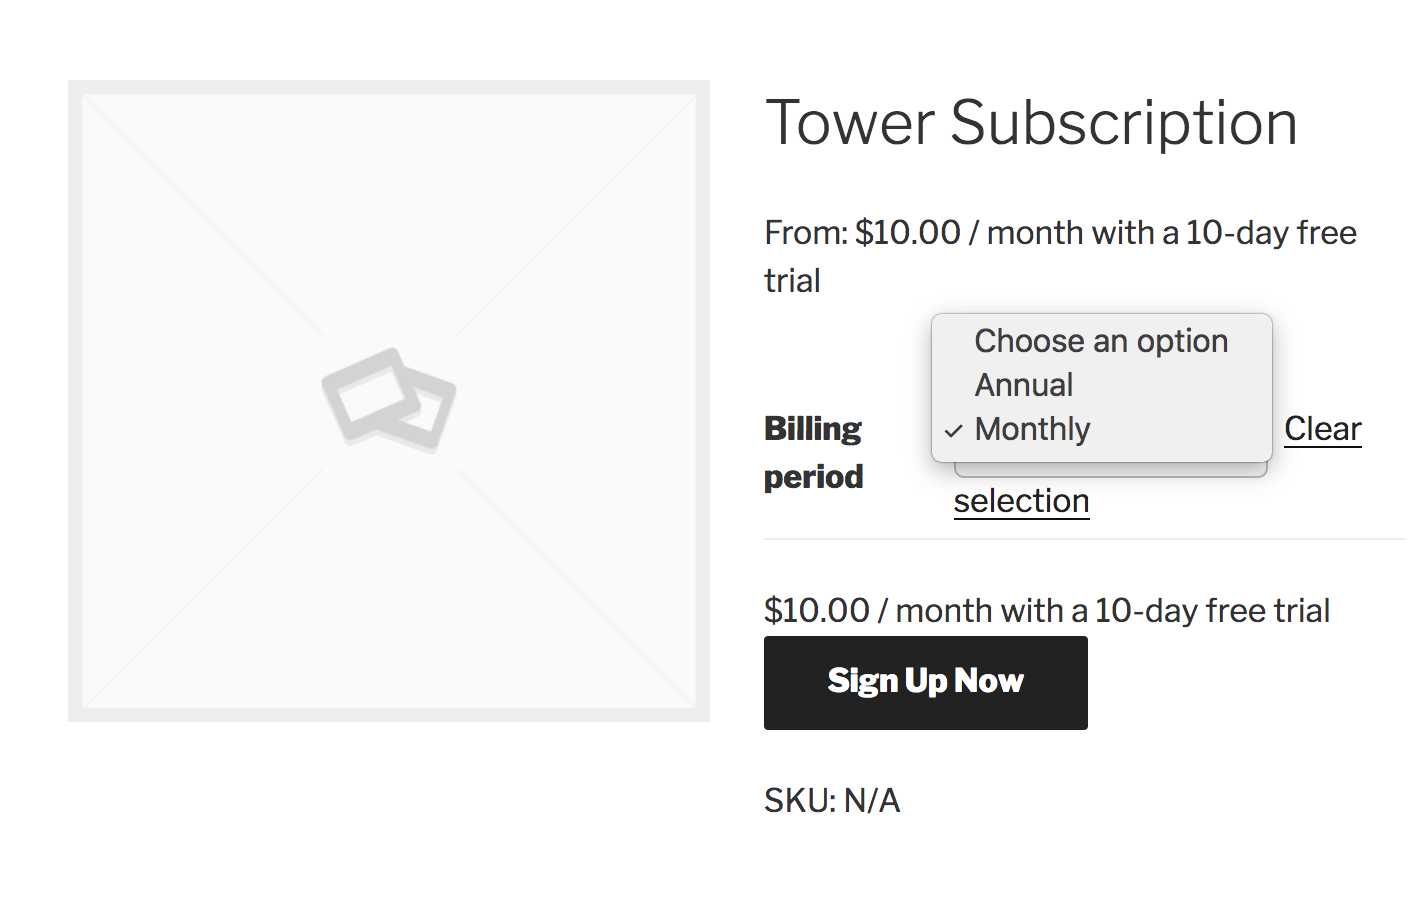
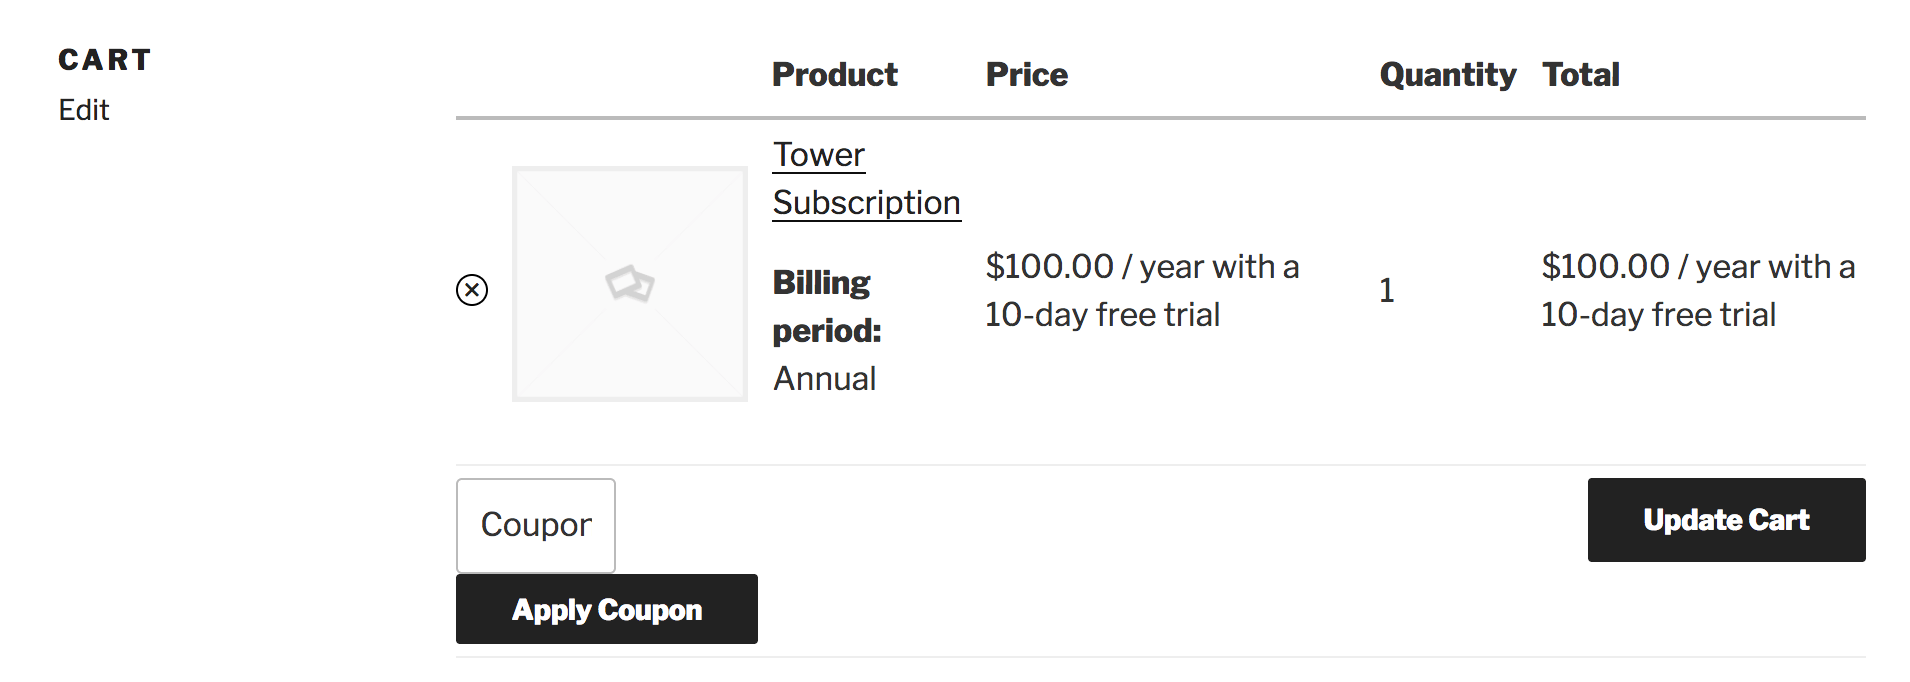
Also, If you click “Sign Up Now” and the go to the cart, you will see the selected product where it says that it has a 10 days trial, and I’m sure you will also notice a little box to add a coupon code. But we don’t have any of those yet, let’s solve that now.
Custom coupon
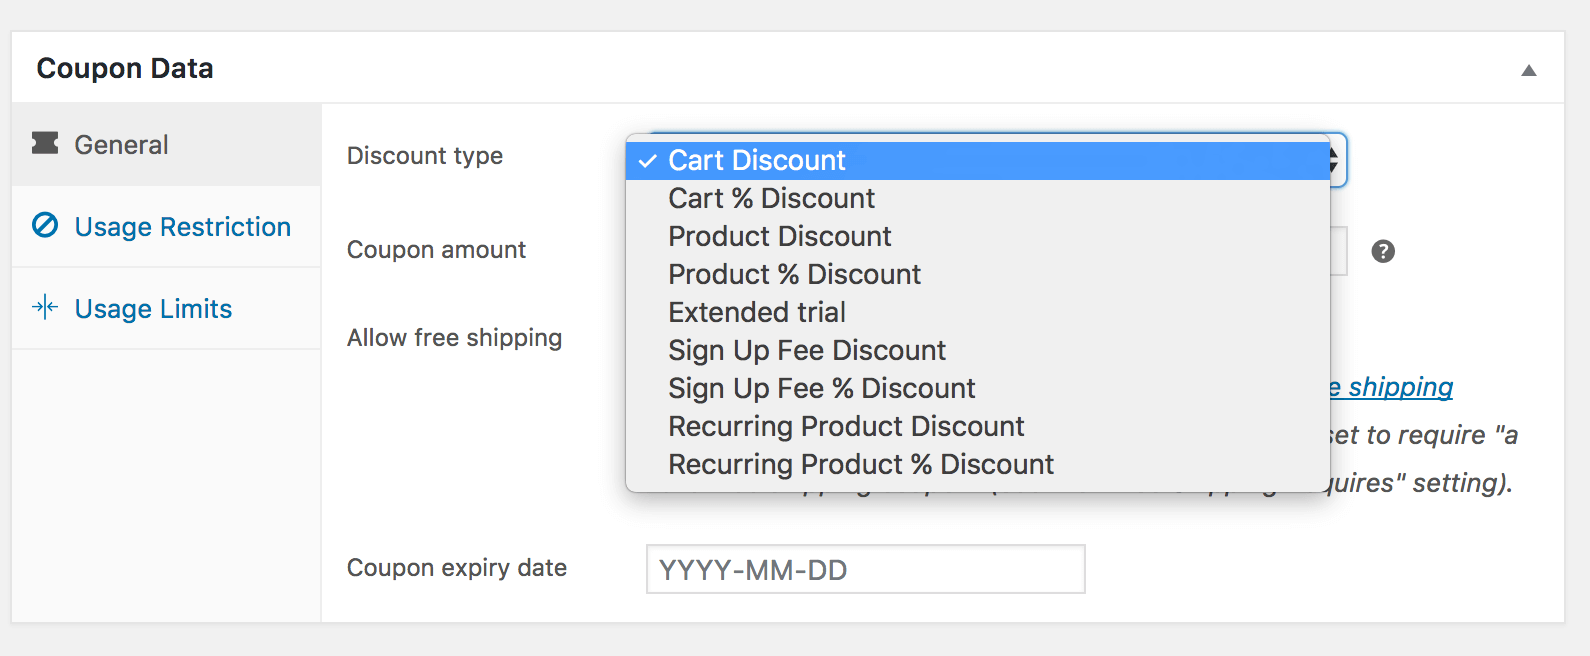
To create a coupon we need to go to WooCommerce -> Coupons -> Add Coupon, if you have the plugin “WooCommerce Extended Trial Coupons” disabled you will only see these types of coupons
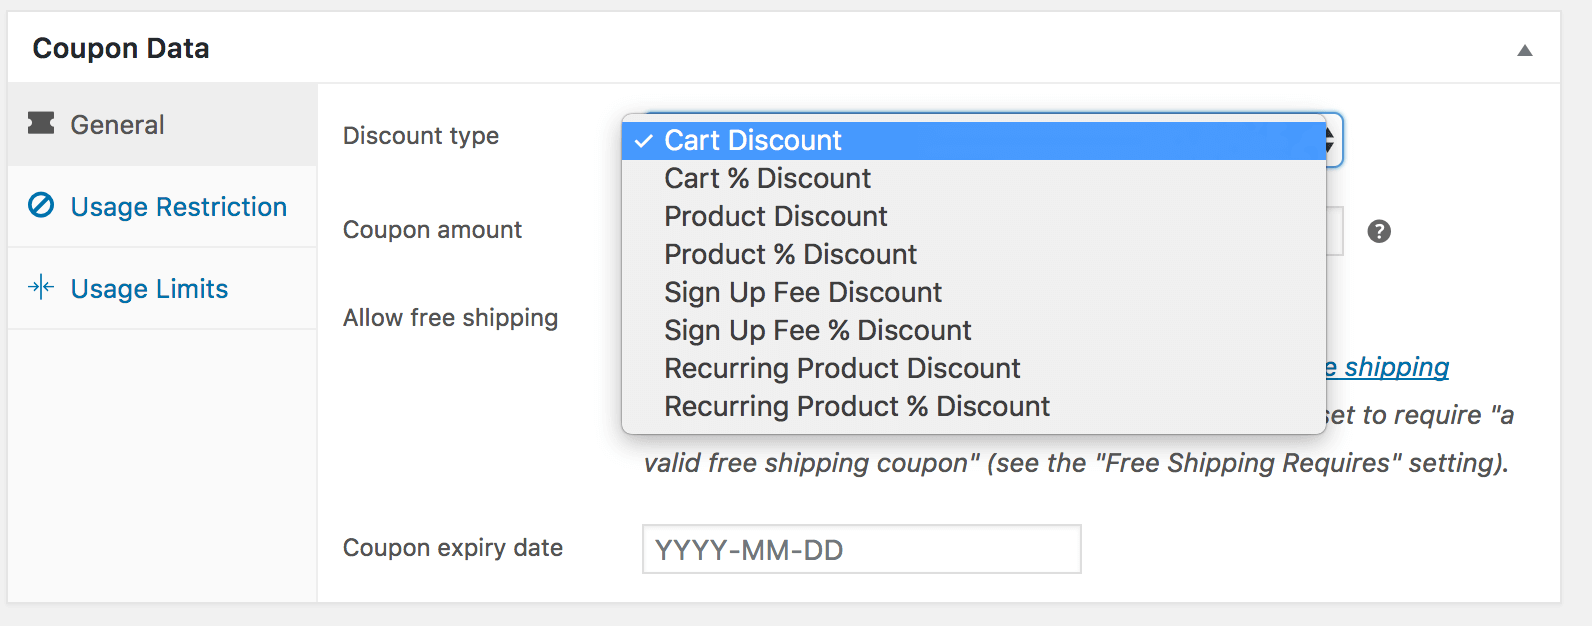
But once you enable the plugin you will see an extra option “Extended trial”
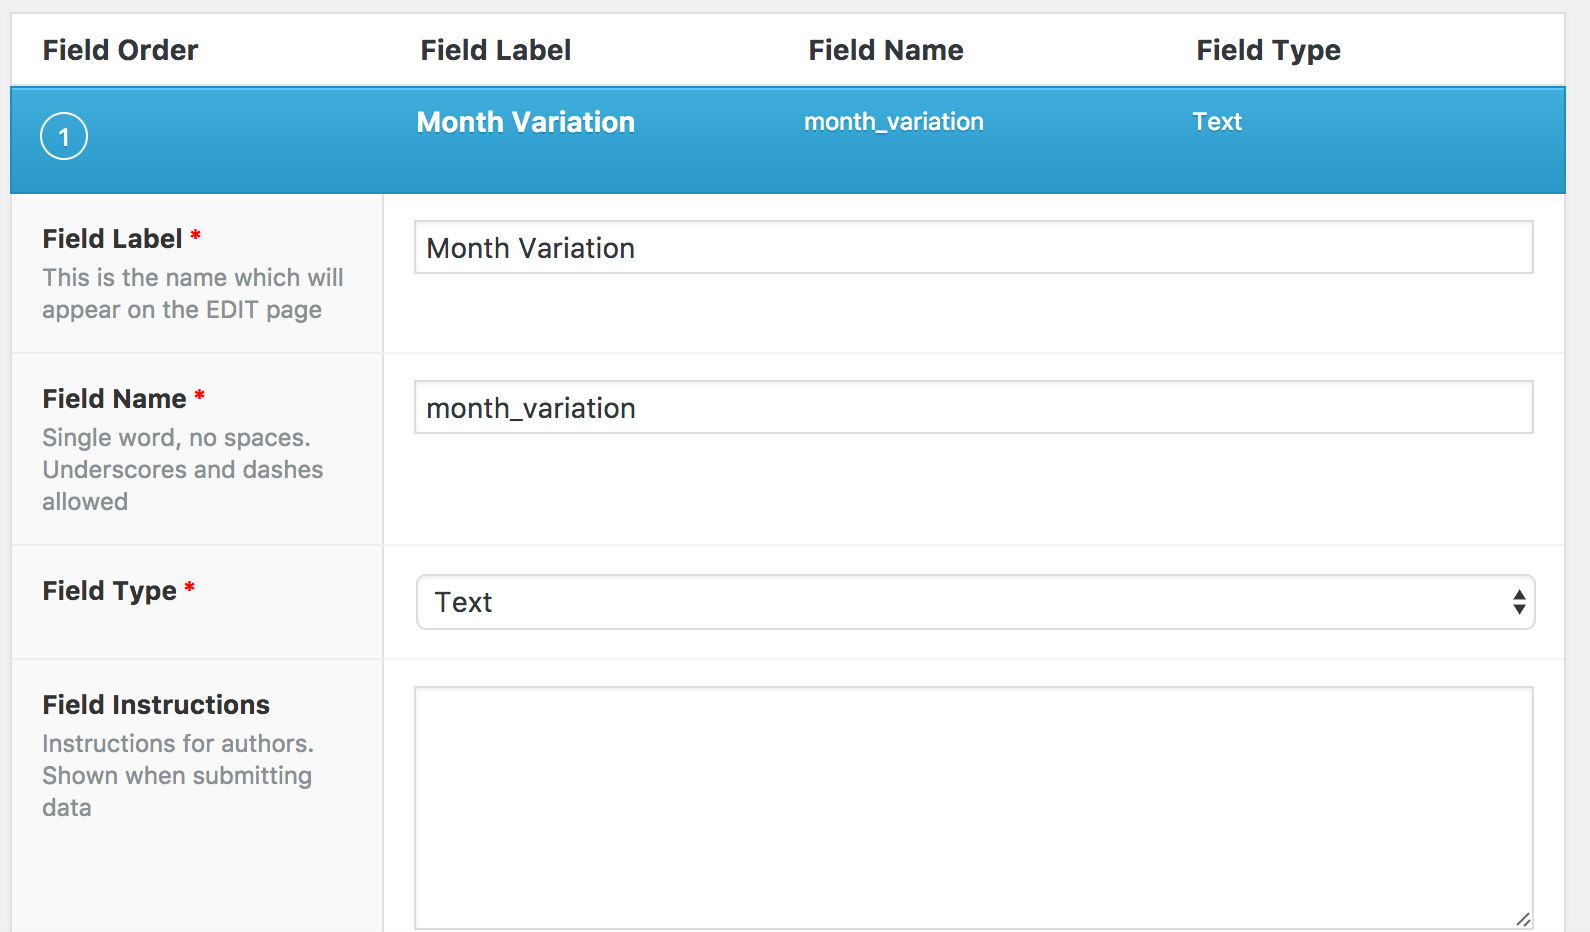
Before we create our new coupon, there are two more setup steps we need to do. Go to Custom Fields -> Add New, select a name, for example, “Woocommerce Coupon”, click “Add Field” it is important that the “Field Label” and “Field Name” to be the exactly the same as on this example because the plugin depends on that (as I told you before, this is a solution for a particular problem). For the first custom field type “Month Variation” as Field Label and “month_variation” as Field Name, leave the rest of the field with their default values. Now create a second custom field for this one type, “Yearly Variation” as Field Label and “yearly_variation” for Field Name.
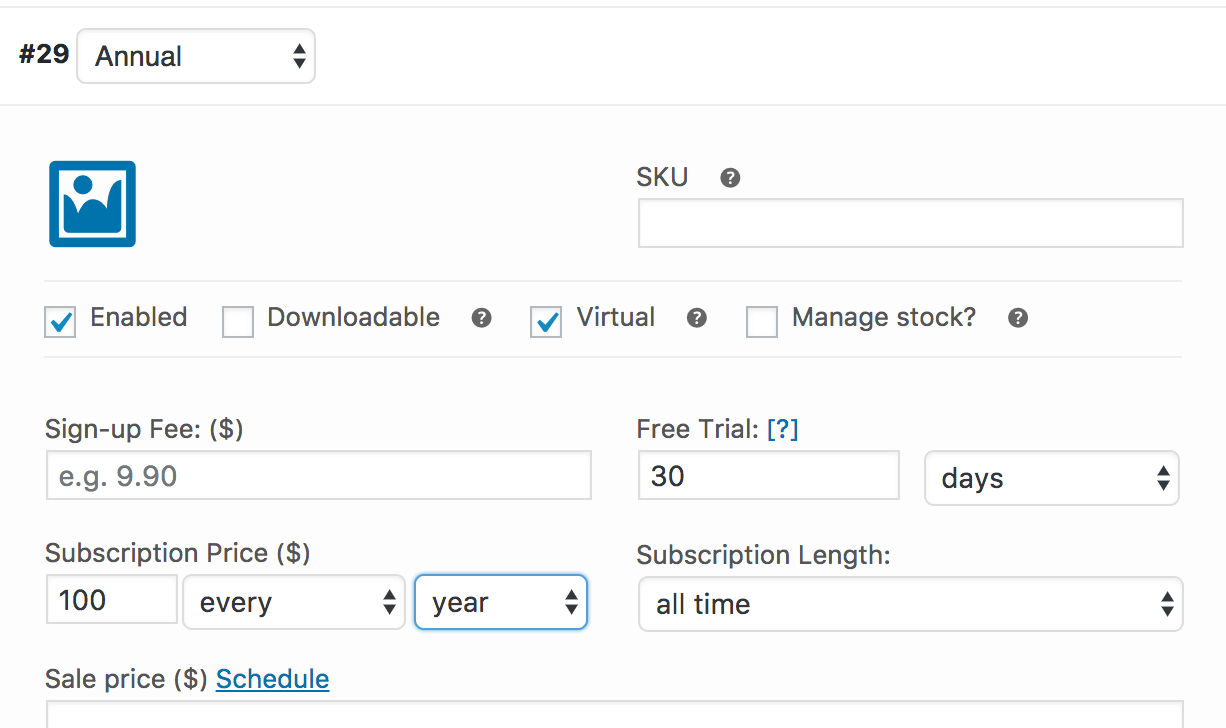
Next in the “Location” section, select Post Type equals “shop_coupon” or “coupon” and publish the custom post type. Go to Products and open the product we created before “Tower Subscription”, we need to add two more variations, this time for the 30 days trial. So click in the Variations section and add a new Variation, select Annual and same as before, select Enabled and Virtual, in the trial field type 30 and select days, subscription price and length needs to be the same as the other Annual variation we have.
Now we need to create one more variation, this time a Monthly variation, also 30 days trial and the same data as the other Monthly variation
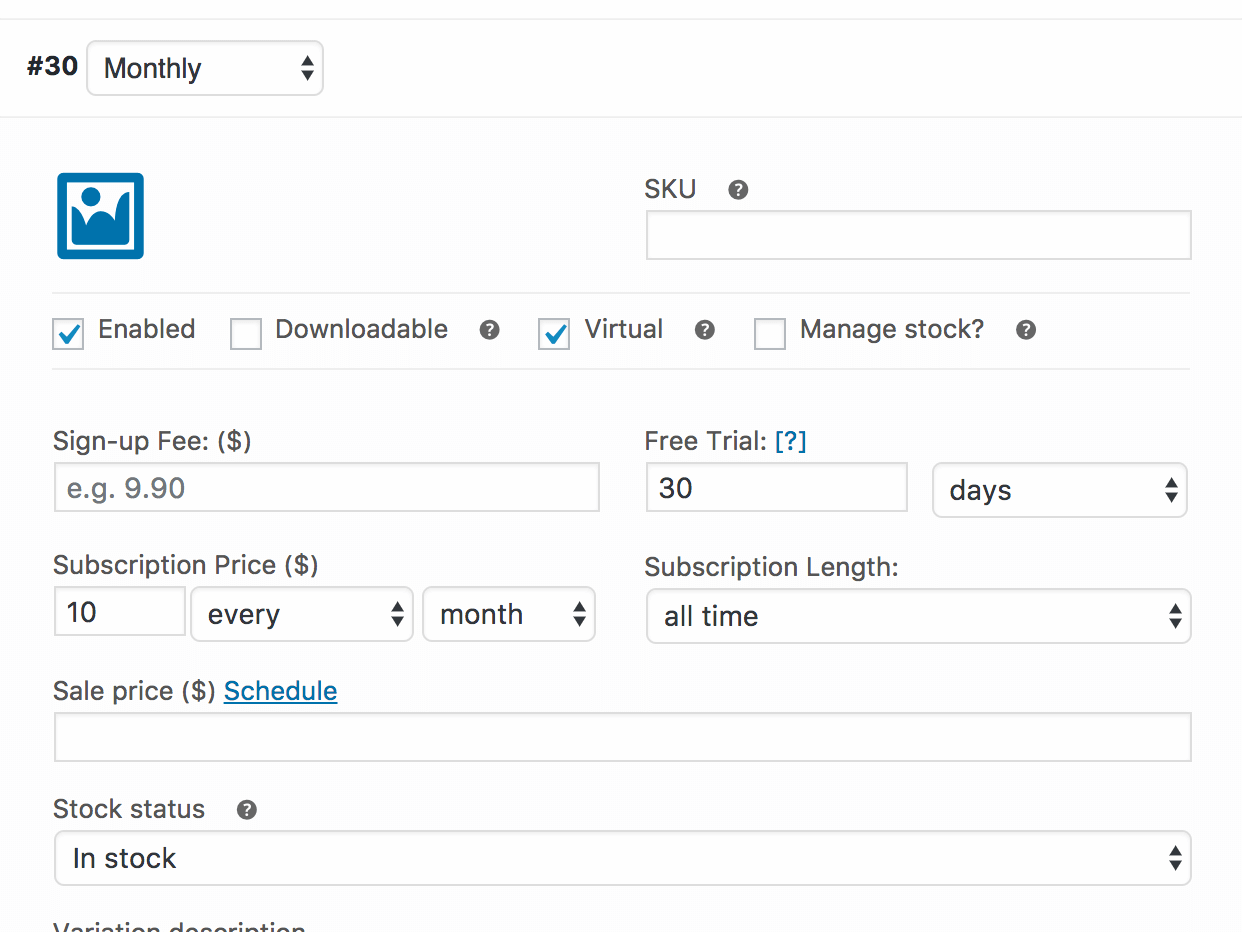
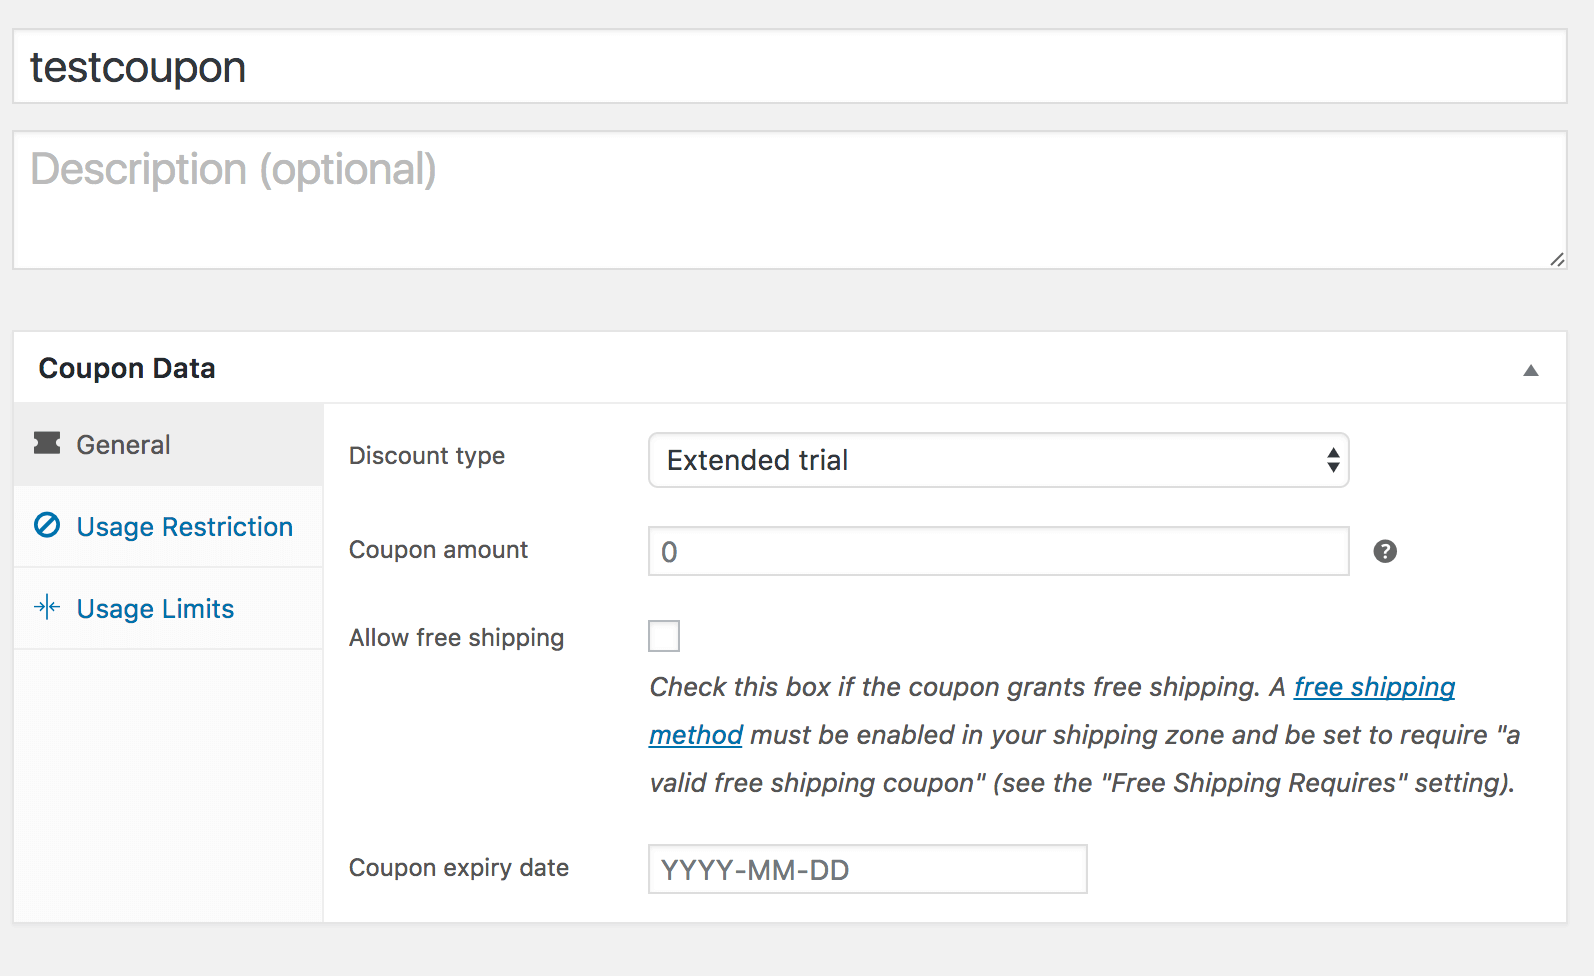
Take note of the Id numbers of these new variations, keep in mind that those will be different from the ones I’m showing in the images. Don’t forget to save changes and update the product. Let’s get back to the coupons section, WooCommerce -> Coupons -> Add Coupon, we need to select a name (this name will be the coupon code used in the cart page) for this example I have used “testcoupon” (most creative name ever!!). For “Discount Type” select “Extended trial”.
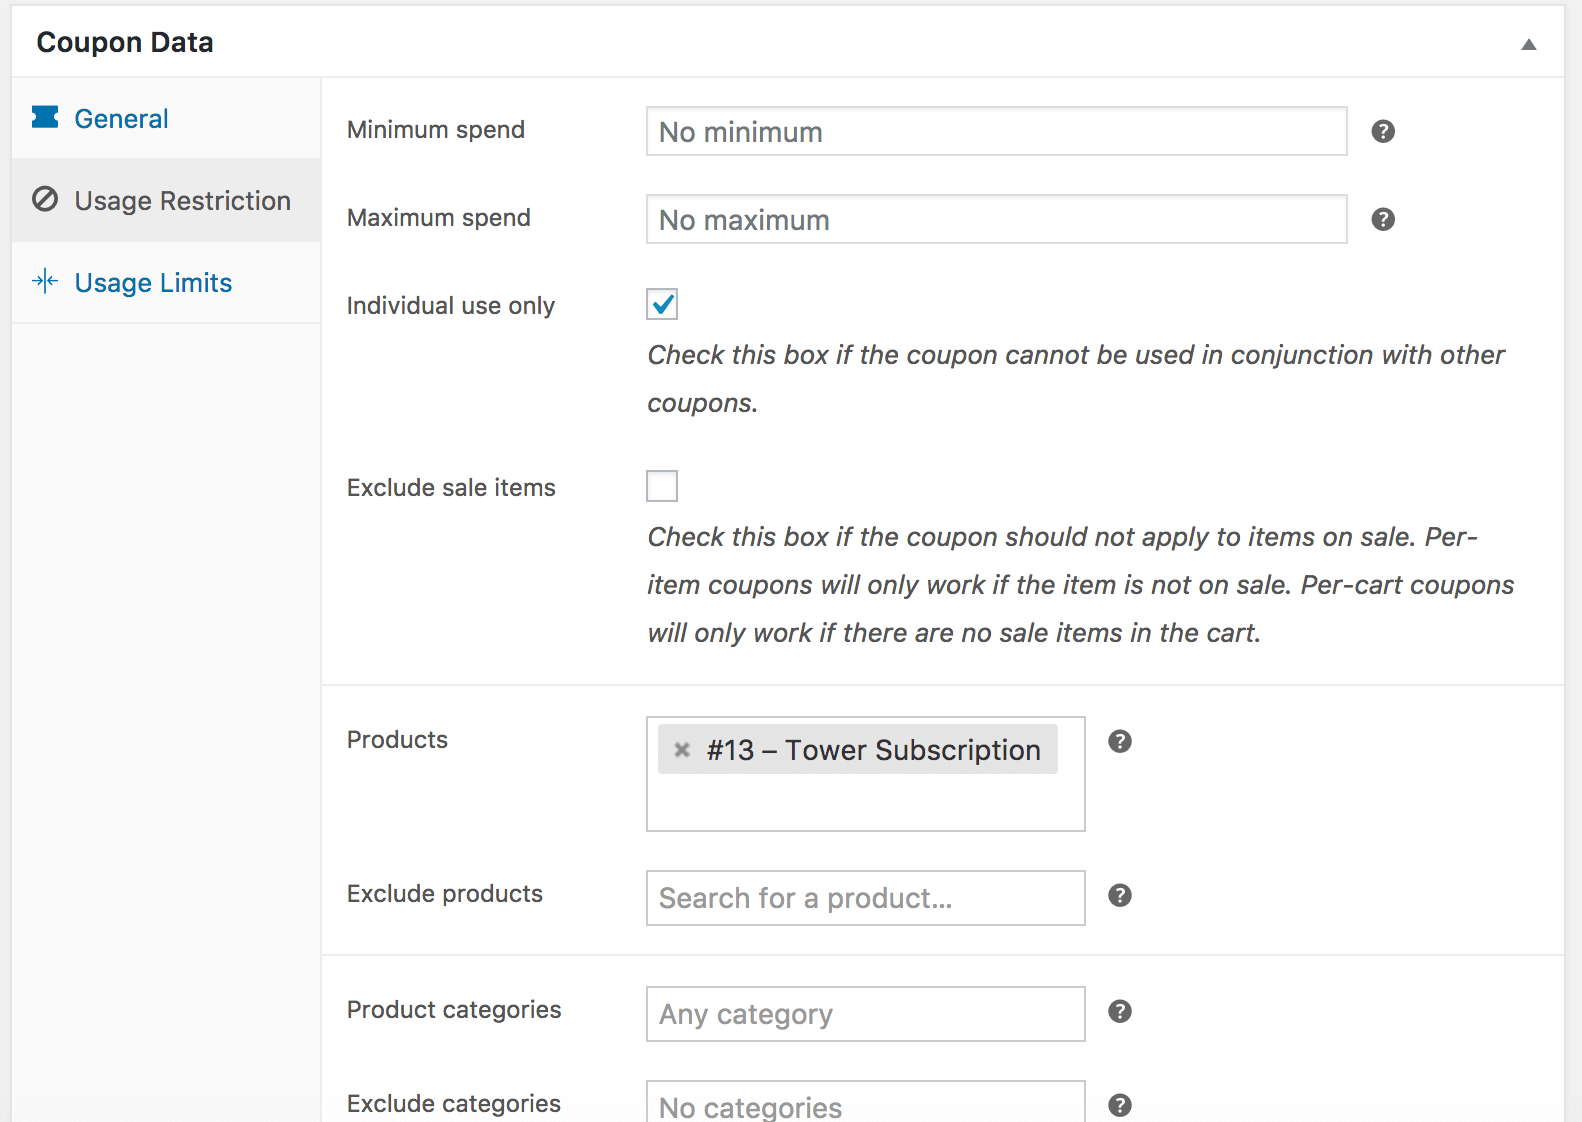
In the “Usage Restriction” section select “Individual use only” and for “Products” select our “Tower Subscription” Product
At the bottom of the page, you will see our two custom fields, there you must type the ids of the two variations that have a longer trial period.

Lastly, publish your brand new coupon. Before we dive into the code that makes this work, let’s see how it works. Go once more to the store page using the “Visit Store” link and click “Select options” in the product select either the Monthly or Annual variation and click the “Sign Up Now” button after that go to the cart page, once again you see that the product has 10 days trial

But now you can use your new coupon, let’s type the code for the coupon and click “Apply Coupon” after that refresh the page to see the changes (since our original problem didn’t require us to refresh the page, it is not implemented in the plugin, but can be added easily)
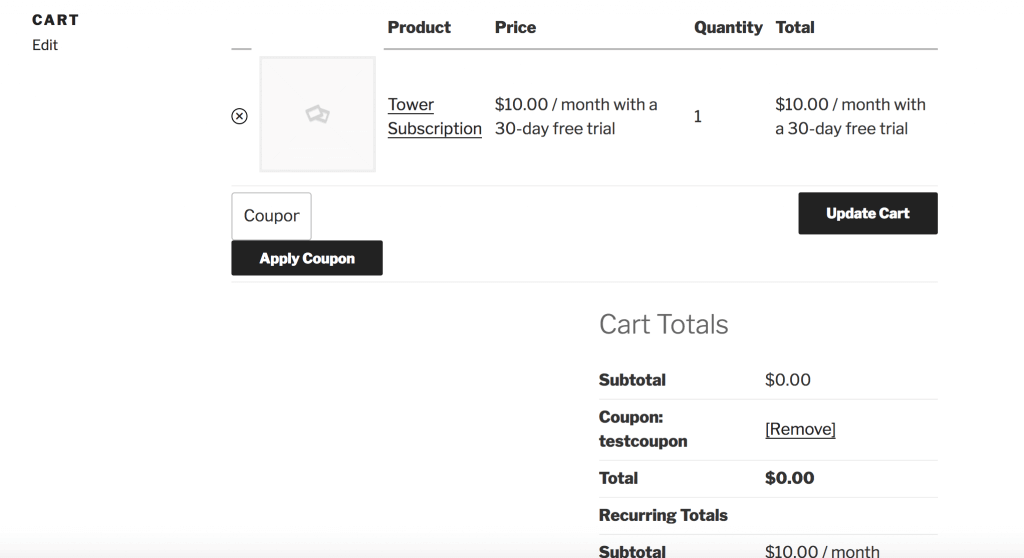
Now you can see that the product now has 30 days trial and the coupon shows as applied.
Behind the scene
Finally, it is time to see the code behind this. It is divided into three parts. First, we use a WooCommerce filter to add a new coupon type named “Extended trial”, the filter is called “woocommerce_coupon_discount_types” and it works as follows
- // Add custom coupon types
- add_filter( 'woocommerce_coupon_discount_types', 'extended_trial_custom_coupons');
- function extended_trial_custom_coupons($discount_types){
- return array_merge(
- $discount_types,
- array('extended_trial' => __( 'Extended trial', 'extended_trial' ),
- )
- );
What we are doing here is just adding a new option to the existing ones. For the second part of the code what we do is validate the new coupon type, if we don’t do this WooCommerce won’t know about our new coupon type and it will flag it as invalid, we do this using yet another filter, “woocommerce_subscriptions_validate_coupon_type”
- //New validation for the new coupon type, without this woocommerce will
- //show an error saying the coupon is not valid
- add_filter('woocommerce_subscriptions_validate_coupon_type', 'extended_trial_coupon_validation', 10, 3);
- function extended_trial_coupon_validation($arg1, $coupon, $valid){
- if($coupon->is_type('extended_trial')){
- $month_variation = $coupon->__get('coupon_custom_fields')['month_variation'];
- $year_variation = $coupon->__get('coupon_custom_fields')['yearly_variation'];
- if(!empty($month_variation) && !empty($year_variation)){
- return false;
- }
- }
- return true;
- };
This part is also pretty straightforward. First, we check that the coupon type is the one we created, this is important, so we don’t mess with other coupon types, then we verify that the coupon is correctly configured, in this case, that the two custom fields have been created and have values, if all is good, we return true, if not we return false and it will be shown as invalid when applied. And then the most important part is the third one, in this case, we use an action, “woocommerce_applied_coupon” this function will have our custom logic, is what the coupon actually does (be aware that this is where the hacking begins)
- //This is the custom logic for the new coupon type, after is validated we bring the
- //product indicated by the id stored in the custom field, and replace the selected one by the product
- //with the longer trial
- add_action('woocommerce_applied_coupon', 'extended_trial_after_coupon');
- function extended_trial_after_coupon($coupon_code){
- // Get the coupon
- $the_coupon = new WC_Coupon( $coupon_code );
- if($the_coupon->is_type('extended_trial')){
- $cart_item = WC()->cart->get_cart();
- if(is_array($cart_item) && count($cart_item) > 0){
- $id = key($cart_item);
- // error_log('ID: '. var_export($id),1);
- $cart_item = WC()->cart->get_cart_item($id);
- $period = $cart_item['data']->subscription_period;
- $product_id = $cart_item['data']->id;
- $coupon_variation = $the_coupon->__get('coupon_custom_fields')['month_variation'];
- if($period != 'month'){
- $coupon_variation = $the_coupon->__get('coupon_custom_fields')['yearly_variation'];
- }
- WC()->cart->empty_cart();
- WC()->cart->add_to_cart($product_id, 1, $coupon_variation[0]);
- }
- }
First, we bring the code instance based on the coupon code, and again we check that the type is the one we created, is that is the case we retrieve the cart items. Later we find the subscription period for that item and the product id. Next, we also get the value in the coupon custom field that represents the product variation. Once we have that, we empty the cart and add the same product again, but this time is selecting a different variation. Remember that we created 2 variations with 10 days trial and 2 with 30 days trial, what we are changing here is the variation for the one selected in the coupon. And that is all. As you see, there is no magic behind the logic, and it will solve a specific problem, but I’m sure that many of you can adapt this to solve other similar problems. I would love to hear other ways to implement this solution.
.jpg)
.webp)